There are plenty of guides on the internet, particularly YouTube for building these pools. The instructions that came with the pool were OK, but far from perfect. These pools are made in the US and all the dimensions etc are in feet and inches (and fractions of inches!). After being let down by a supposedly professional contractor, I ended up building our pool myself (with a bit of help from a friend). The build is fairly straight forward, but it’s time consuming and requires some patience, a lot of measuring and some strength (the steel pool side is incredibly heavy).
Please note that the notes below are not a substitute for the pool build instructions that will come with your pool. All pool builds are likely to be a bit different, and you must follow the instructions for your pool and get professional help if you need it.
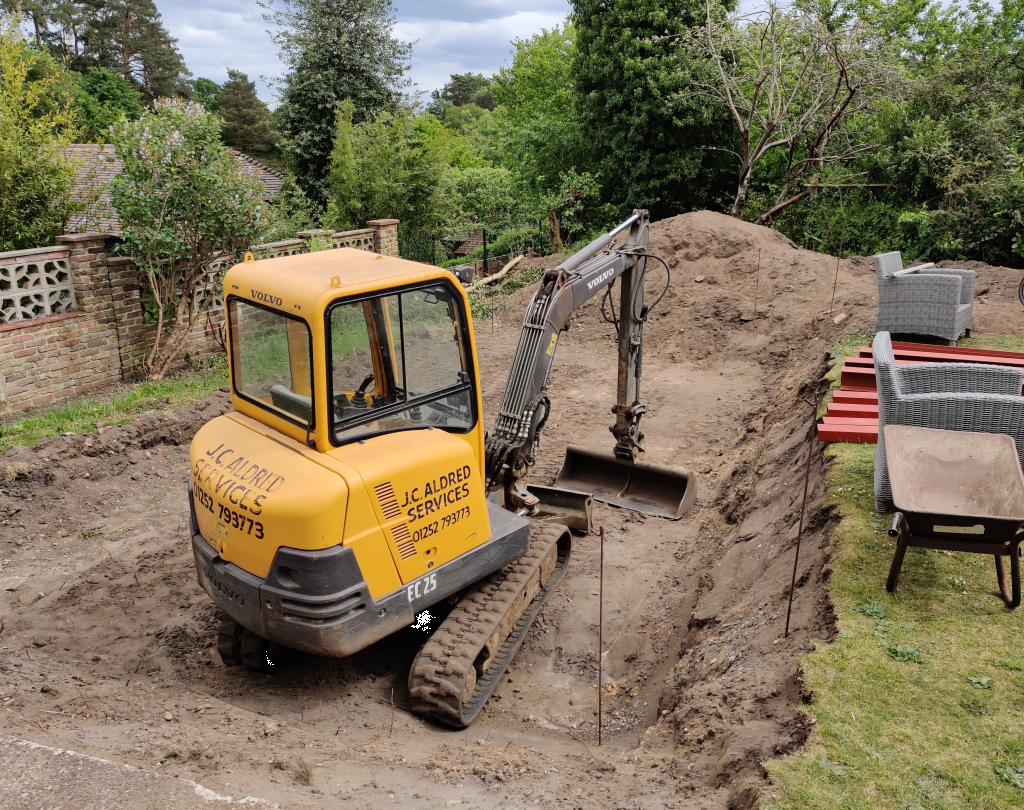
Creating a flat pool build area
The first job is to get a decent flat area created. I had an earthworks contractor get this flat area generally level (and they also created a sleeper retaining wall). I then got a laser level and marked out areas high and low (I did it in the dark so I could see the laser on the tape measure). After some scraping and tamping (with this tool) I had a nice flat area of compacted scalpings for the 24×12 oval Serena pool.
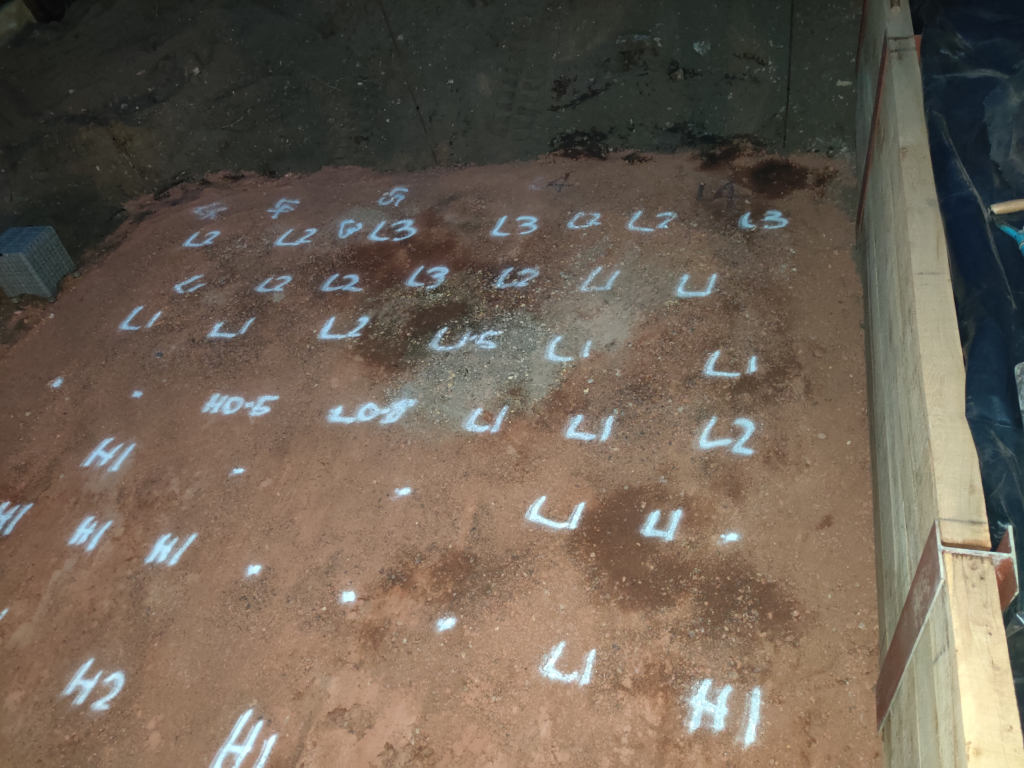

Laying out the pool and foundation stones
This step took some time and considerable care. There are building blocks under each ‘post’ of the pool, and under the base of each of the side supports – i.e. all around the edge of the pool. These needed to be in the right place and exactly level with each other. To avoid messing about for hours with spirit levels (and the risk of ‘chasing’ myself around the edge of the pool area only to find out I was out when I got back to where I started from), I got a laser level and staff, and used these to make sure the building blocks were exactly right.
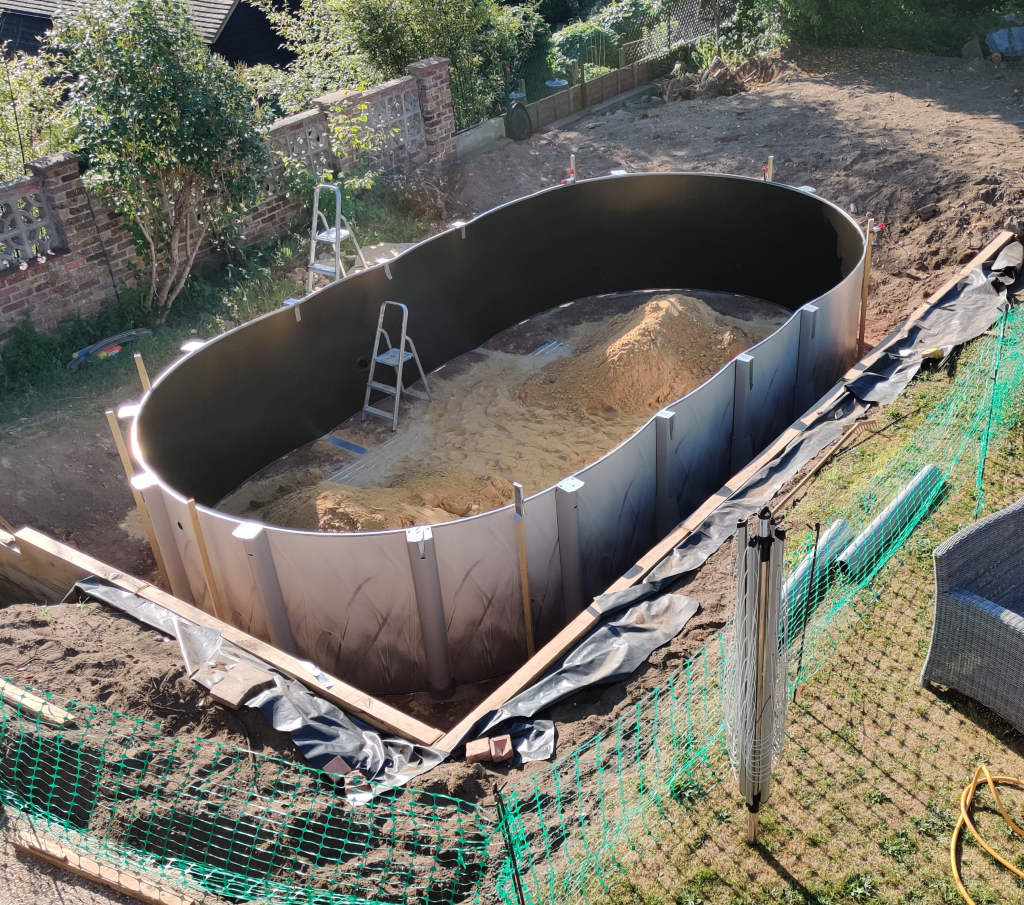
Side supports and steel wall
This was a very tricky bit of the build. There are three side posts down each side of the Serena pool I was building. They had to be measured and positioned exactly in place (diagonal distances, straight distances, aligned down each side and also set at the right height). The instructions gave dimensions and it took a lot of measuring, checking and adjusting to get right. Before we put the steel side wall in, we also put some of the sand that was going down at the base of the pool inside the pool area. Then it was time to man-handle the steel side wall into place and unroll it. We used wooden posts bashed into the ground and gaffer tape to hold the side of the pool in place while we fixed the pool support posts around the outside edge.

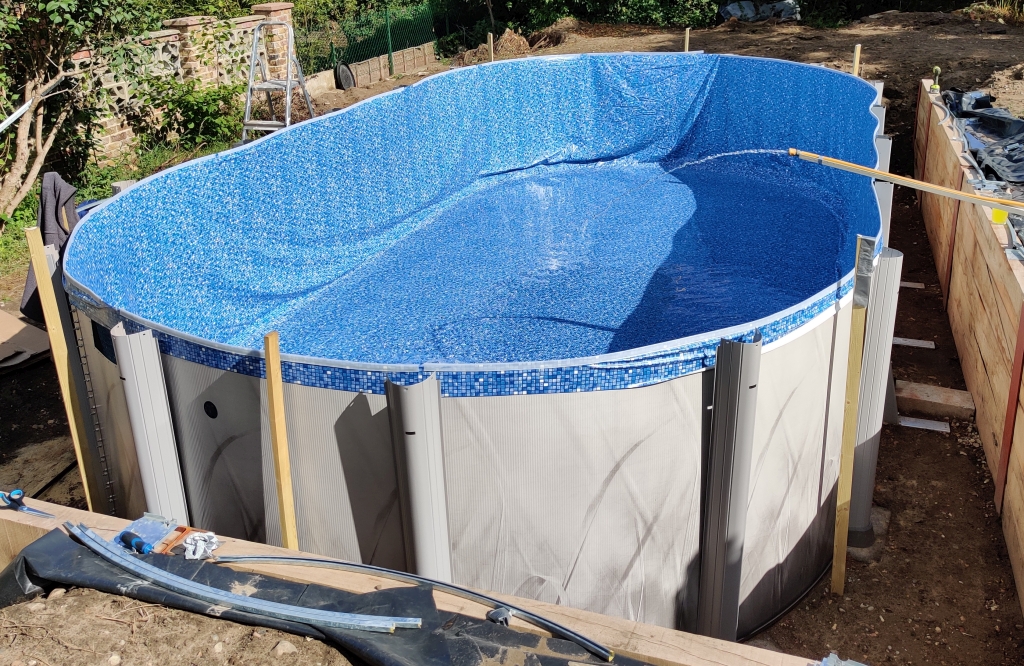
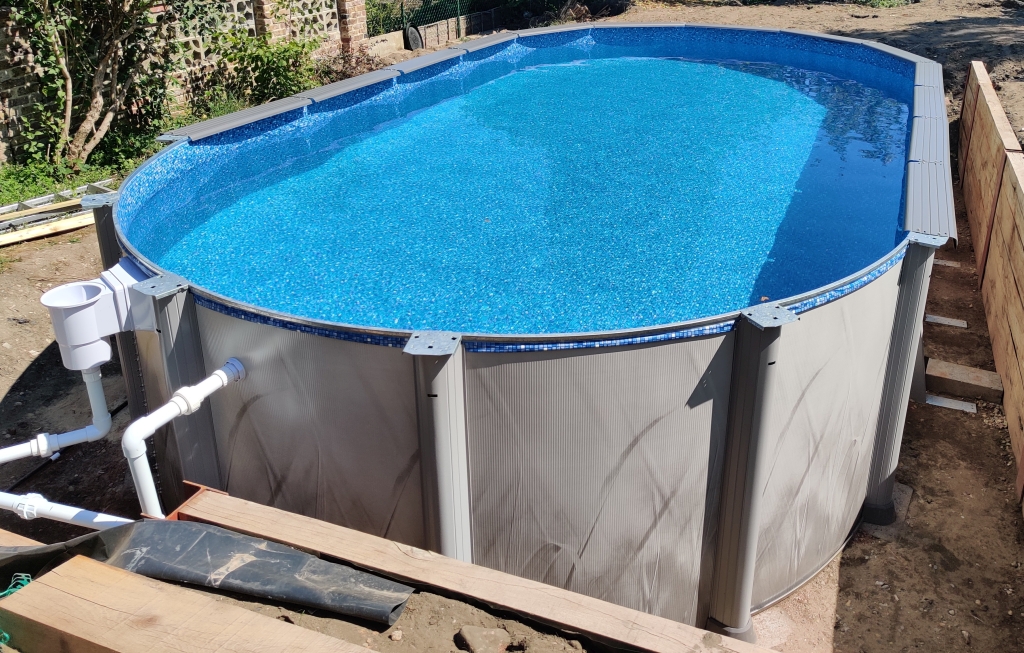
Sand, the liner, and filling the pool
The next job was to finish spreading the sand in the base of the pool area, and to build a ‘cove’ against the bottom of the side wall (which required some plastic sheeting to be taped to the inside of the base of the side wall so the sand didn’t touch the metal of the wall itself. Then, having tamped the sand down firmly, it was on to fitting the liner. The instructions say to fit the liner on a still day – presumably to avoid it blowing about when you are trying to get it into the pool. We laid the liner along the long length of the centre of the pool and opened it out, then wrapped the liner over the top of the pool edge, and held it in pace with the nylon and metal strips. Using an inch of water or so to hold the liner flat and in position, we removed as many creases as we could, then tried to keep doing that as the pool very slowly filled from our mains supply hosepipe.


Skimmer, inlet and pipework
Another bit that required a lot of care was to fit the skimmer and inlet pipework. This involved cutting the liner very carefully where these were located. The instructions were very light here, although they did note not to cut the holes until the liner is adjusted and in place, and the pool is at least 1/3 full of water. Then there was some pipework to do to get to the pump, and heater.

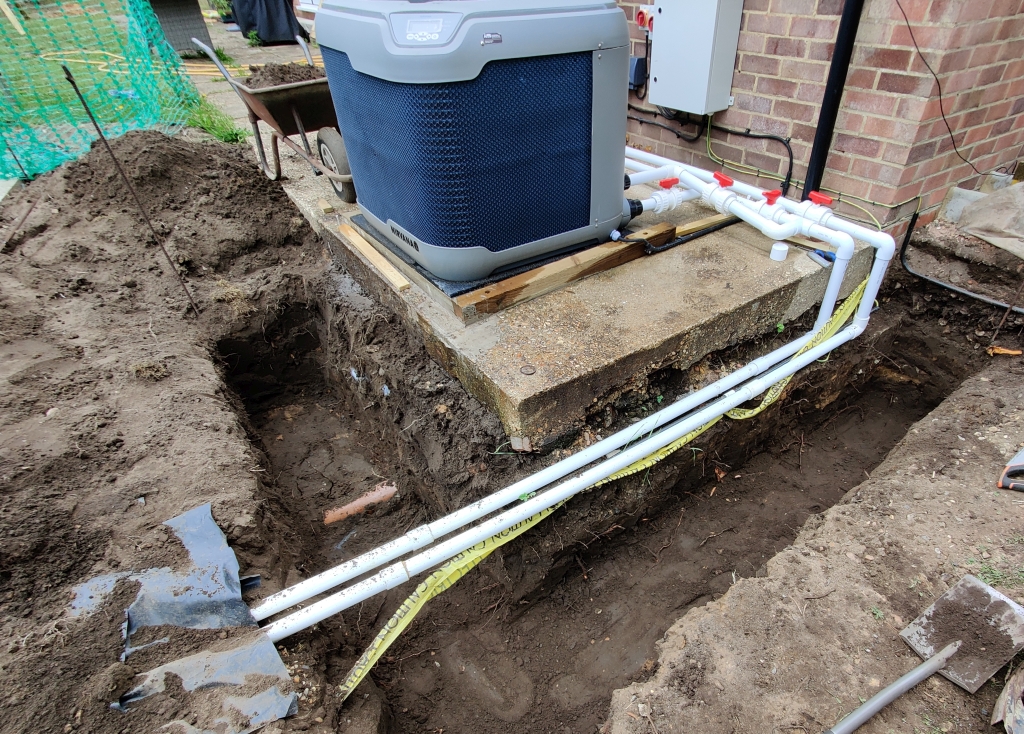
Pump, filter, heat pump and electrics
Our installation was using the water pump and filter that came with the swimming pool kit (“Pool Style” branded), and a Nirvana air source heat pump. The water pump and filter were installed in a Keter plastic garden storage unit to minimise noise of operation. The garden storage unit and the air source heat pump were installed on a concrete slab that was about level with the top of the water surface. This caused an issue, because the water pump could not cope with being above the water level, as it was not self priming. It just wasn’t up to the job, and couldn’t pump enough water to get enough throughput to activate the air source heat pump, so the Pool Style water pump got replaced for a Sta-Rite single speed pump which was much better. The air source heat pump and the Keter garden storage unit were placed on sound deadening matting. The water pump and the air source heat pump were professionally connected up by a qualified electrician who took time to ensure the whole installation, including the pool itself was correctly earthed. He installed a timer socket so that the water pump could run on a timer each day, and the air source heat pump would run when the water pump was running and the temperature of the water required heat.
Ladder
The ladder that came with the pool kit was installed, and really was found to be pretty awful. It flapped around, knocking against the liner in the pool and generally wobbling about. I ended up gaffer taping foam matting pieces to the bottom of it to protect it from damaging the liner, and using roof-rack straps to hold it in place from moving about when people climbed in and out of the pool. Generally it wasn’t designed to fit in the space by the retaining wall, but even on the other side of the pool where there is no retaining wall it still wobbled about. I have since replaced it with a stainless steel ladder (see separate posting about this).


Conclusion
The pool build took a number of weeks (being fitted in around day job), and was an interesting lockdown project. I had some good help from a friend of mine who has some experience with pool builds, although not of this type. In general it was quite a stressful experience (not helped by the contractor who let me down). It was also not a cheap experience, with significant costs for earthworks, retaining walls, electrical installation, replacement water pump etc.